How to Add SVG in WordPress (2 easy methods)

It is a great thing to add SVG in WordPress as it is versatile format used in multiple fields in WordPress.
SVG images are a great way to make your website attractive. They are widely used in sectors like web development including WordPress because of its flexibility, scalability, and lightweight nature. From Icons and logos to Animations and UI elements, SVG’s versatility is what it stands out from other formats.
However, WordPress doesn’t support the use of SVG by default. Therefore, you’ll have to manually enable SVG in your WordPress to enjoy its limitless possibilities.
First of all, let us know what actually is SVG and what are the benefits you’ll get from using it.
What is SVG and what are the advantages to add SVG in WordPress?
SVG stands for Scalable Vector Graphics. It is an XML file that is used as a logo, icons and images. It is responsive and can be resized and scaled without losing its quality. SVG is widely used for displaying graphics on the website because of its scalability, meaning it does not lose quality when resized to various dimensions.

There are two methods to add an SVG image in WordPress. Having said that, let’s get started:
Upload SVG Files in WordPress Using Plugin
The fast and easy way to use SVG is by using plugins. Beginners are recommended to upload SVG files by using plugins. All you have to do is install and activate an SVG support plugin.
- First of all, you need to log in to the WordPress admin area.
- Upon activation, navigate to Settings>>SVG Support tab.

- Next, check the box next to Restrict to Administrator. Doing so will make sure that only administrators can upload SVG files.
- You can also check the box next to Enable advanced mode.
- Click on the Save button to apply the changes you made.
Finally, you can easily upload SVG files to your site.
Modify your Site’s functions.php File
Using too many plugins can potentially harm your website. Hence, this method is the fastest and safest way to add SVG support in WordPress. You can easily upload SVG images via simply modifying your site’s function.php file.
- First of all, log in to your site using an FTP client.
- Go to the root directory.
- Locate function.php file and open it in edit mode.
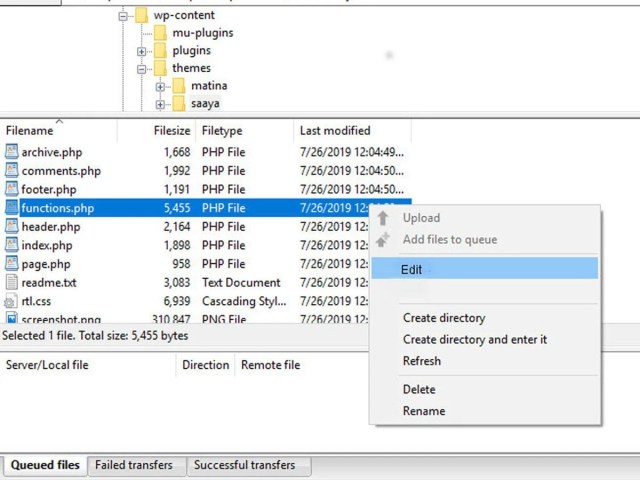
- Now all you have to do is copy and paste the following code in the file.
function add_file_types_to_uploads($file_types){

$new_filetypes = array();

$new_filetypes['svg'] = 'image/svg+xml';

$file_types = array_merge($file_types, $new_filetypes );

return $file_types;

}

add_filter('upload_mimes', 'add_file_types_to_uploads');
At last, save the changes you have made. Once you are done, you can add SVG images in WordPress. Using svg from unknown source is risky from a security point of view. Hence, make sure that svg is sanitized or downloaded from secure source before using it.
Final Thoughts
Now that you have learned how to add SVG in WordPress, go give it a try! I hope you find this article helpful. You can also follow us on Facebook and Twitter.
Do not forget to subscribe us for more informative tutorials.
If you have any questions related to this topic, please write us down in the comment section below: