How to Use WebP Images in WordPress?

Do you want to start using WebP images in your WordPress website?
WebP image format is the best image solution on the web. Recently released WordPress 5.8+ has added full support for the WebP format. So, you can easily use WebP images on WordPress websites instead of JPEG or PNG formats. Using the new WebP format in WordPress can help you make the web faster.
In this tutorial, we’ll talk about how to use WebP images in WordPress.
What Is WebP?
WebP is a modern image format that was developed by Google. WebP image format reduces the size of images without having to sacrifice quality. The image format is capable of reducing the file size up to 26% – 34% in comparison to PNGs and JPEG.
Benefit of Using WebP Images
WebP format creates quality images that are smaller in file size. Besides that, there are other benefits of using WebP images.
- Smaller media file size
- Faster site loading speeds
- Better SEO ranking
- Less bandwidth consumption
- Supports transparency and animation
WebP Browser Support
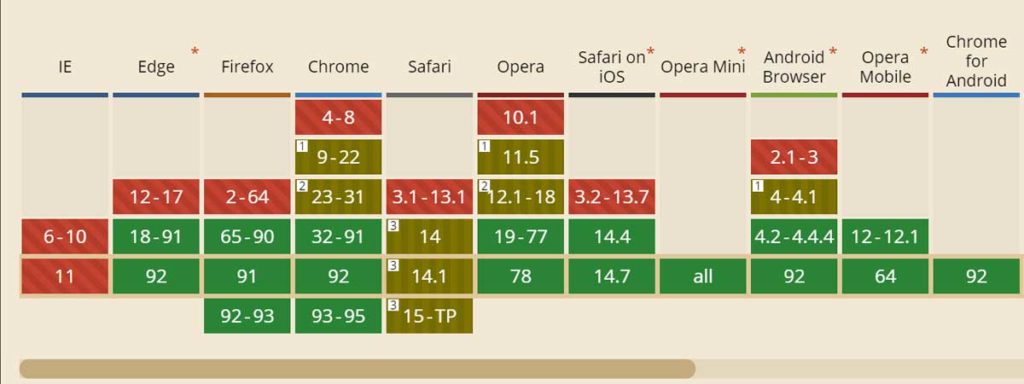
WebP is supported by 94% of web browsers such as Google Chrome, Firefox, Edge, and Opera browsers. However, there are still some older browsers that don’t support it. As of right now, Safari browser version 3.1 to 11.1 doesn’t support WebP Image Format.

How to Use WebP Images on WordPress
Since WordPress 5.8 has full support for WebP images, you can directly upload WebP images to your media library. That means you can add WebP images to your posts and pages directly. The process is similar to the normal process of uploading PNGs and JPEGs in WordPress.
However, if you use WebP images directly on your website, 5% of users on a WebP non-compatible browser or Safari users on older macOS versions wouldn’t be able to see your images. It will negatively impact your site.
To solve this problem, you can use a WordPress plugin to deliver WebP images to supported browsers, but then use JPEG/PNG format for the 5% non-supported browsers.
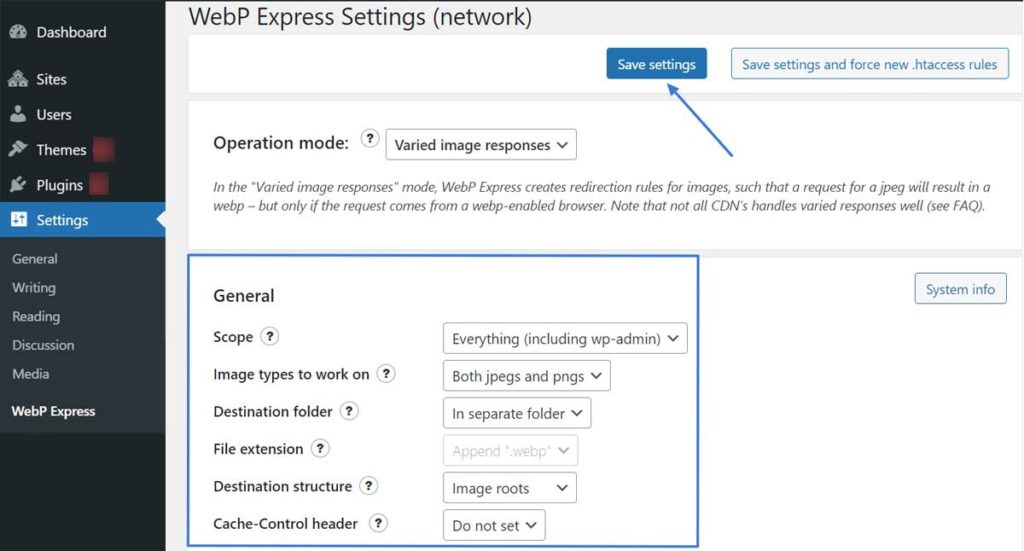
First of all, log in to the WordPress dashboard using a login credential. Then, install and activate the WebP Express plugin. This plugin allows you to auto-generate WebP images to browsers that support them and serve jpeg and png files on non-supported browsers.

Upon activation, navigate to Settings » WebP Express to configure plugin settings. From here, you can set the settings to auto-generate WebP images for all images in your media library.
That’s it! You’ve successfully added WebP images in WordPress.
Final Thoughts
Hence, this is our detailed guide on how to use WebP images in WordPress. I hope you find this article useful and that it helped you understand the method of using WebP file format in WordPress.
You can also follow us on Facebook and Twitter.
Don’t hesitate to ask any questions in the comment section below:
You might also like to read other articles:
