How to Add Push Notification on your WordPress Website

Are you using push notification on your website to notify your users about the newly published blog or announcement? If not then you are losing a large amount of traffic.
Push Notification for WordPress will send a notification to your user even if they are not visiting your website and make them return to the website once again. It is a great way to increase engagement and drive traffic through repeated visitors.
Without further delay let’s add push notification on WordPress Website.
Add Push Notification on Your WordPress Website
Installation and Setup
Before we start, create or login to the OneSignal account by going to its official website. After creating an account, you’ll obtain an APP ID and REST API Key. Copy and paste it somewhere safe because you’ll need it to continue.
Next, you need to install and activate the one single push notification plugin on your WordPress website. If you need help, then see our article on how to install and activate plugins in WordPress.
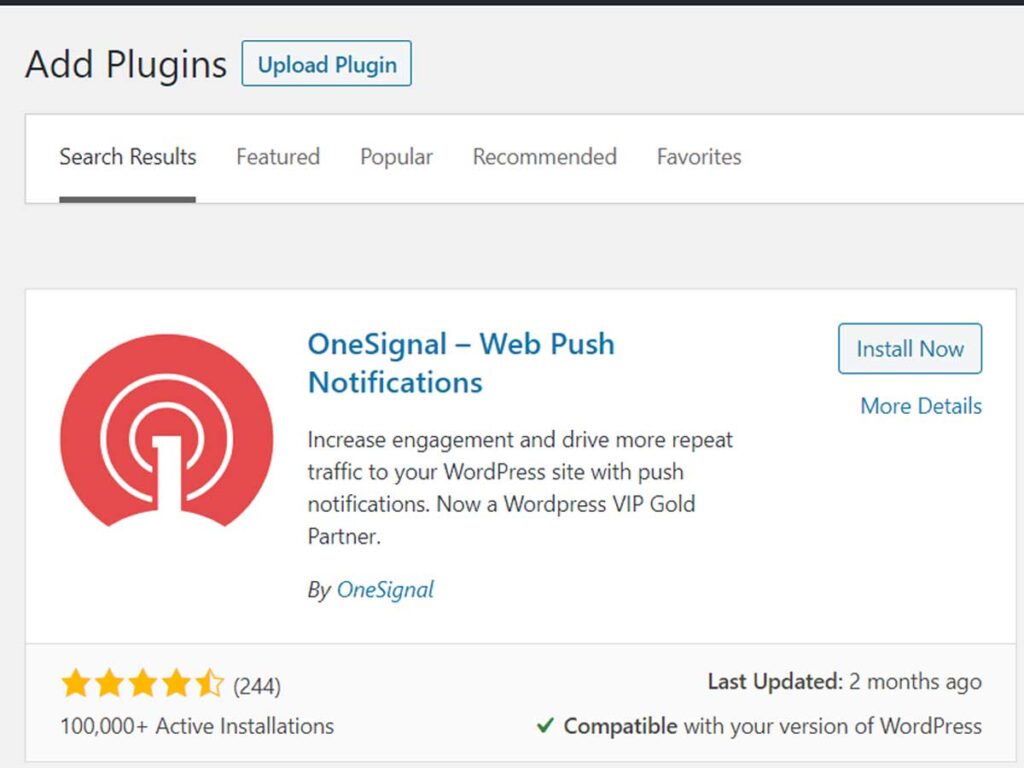
Once you’ve activated the Onesignal WordPress plugin, you will see a OneSignal Push option in your WordPress panel, click on it. Doing so will lead you to the setup page of the plugin. Switch to the ‘Configuration’ tab and paste the APP ID and Rest API Keys on the respective field box. Then, scroll down and click on save once you are done.
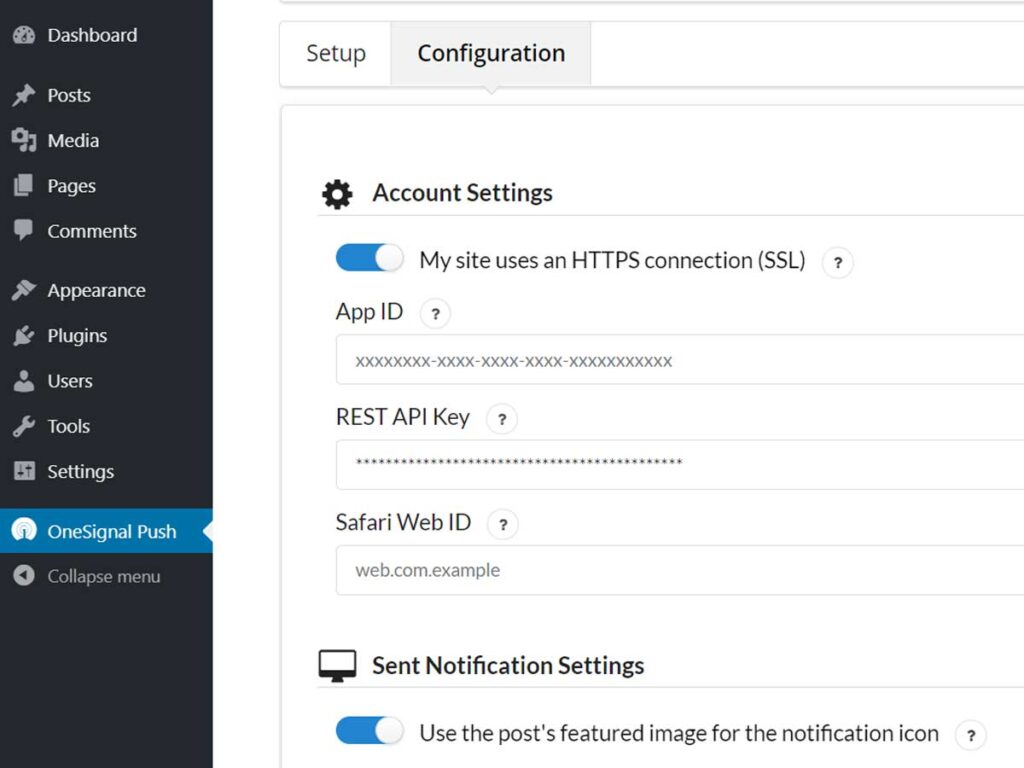
This API ID will only work for Google Chrome and Firefox browsers. You need to create a Safari Web ID, if you wish to add the push notification in safari browser too. You can easily generate the safari Web ID from the One Signal website.
WordPress push notification requests will now show on your website. Open your website in incognito mode to see the push notification popup on the top and a bell icon on the bottom of your page.
Configuring Push Notification
You can also customize the WordPress push notification icon as you like. By doing this you can ensure that the notification icon blends in with the design of your website and also attracts visitors to press the icon. You can find the customization options in the configuration tab.
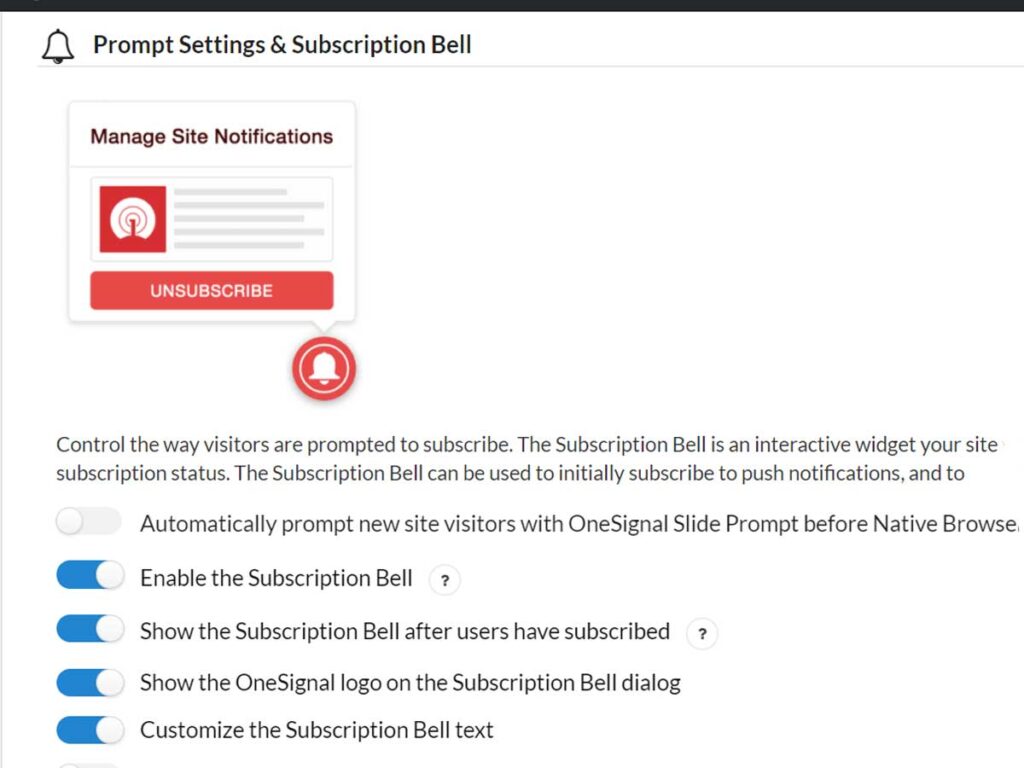
There, you’ll see options to prompt customization, welcome Notification setting and so on.
Sending Push Notifications
Once you are done with configuring the notifications, it’s time to send push notifications to your subscribers. The plugin will automatically send push notifications to users and notify them about the new post you published. If you want to stop sending an automatic push notifications in WordPress then there is also an option to disable the automatic push notification in the configuration tab.
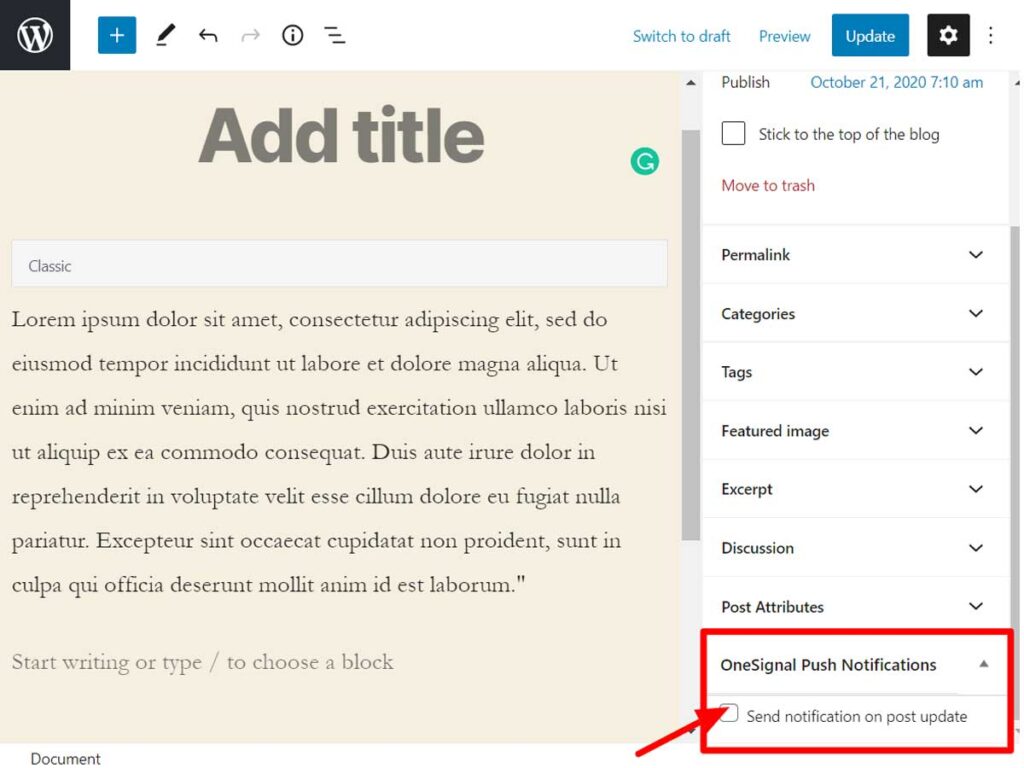
You can also send push notifications manually when you publish an article. You can find an option to manually send push notifications on the right-hand side section of the post editor screen. Simply check the send notification on post publish box after the post or page is published or updated.
Wrapping Up
To wrap up, this is how you can add push notification on your WordPress website. You can also install the Onesignal WordPress plugin and start sending push notifications to your audiance. Please follow us on Facebook and Twitter.
If you have any queries regarding this tutorial, ask us in the comment section below:
