How to Add Custom Fonts in WordPress(2 Methods)

Do you want to use custom fonts in WordPress website?
Custom fonts can enhance the look of your website and improve readability as well. Unfortunately, WordPress doesn’t come with custom fonts option. However, there are other ways to add typography that looks beautiful, clean and outstanding.
Let’s take a detailed tour on how to add custom fonts in WordPress.
Where can you find fonts?
Selecting which fonts to use can be pretty hectic. You can find both licensed and free fonts resources to choose from. There are many websites when you can find suitable fonts for your website. Some of the best sources are Google fonts, adobe fonts, fonts.com, Envato etc.
Add Custom Fonts in WordPress
Adding fonts is as simple as changing fonts colour and size. There are several ways that you can add custom fonts in WordPress. Here, we’ll only discuss two methods to add typography in detail:
Method 1: Via Using Plugin
When it comes to adding custom fonts, there are several typography plugins available like easy google fonts, google fonts typography, custom fonts and so on.
Here, we are going to use Easy google fonts plugin for the sake of the tutorial. Before you begin, install and activate the plugin.
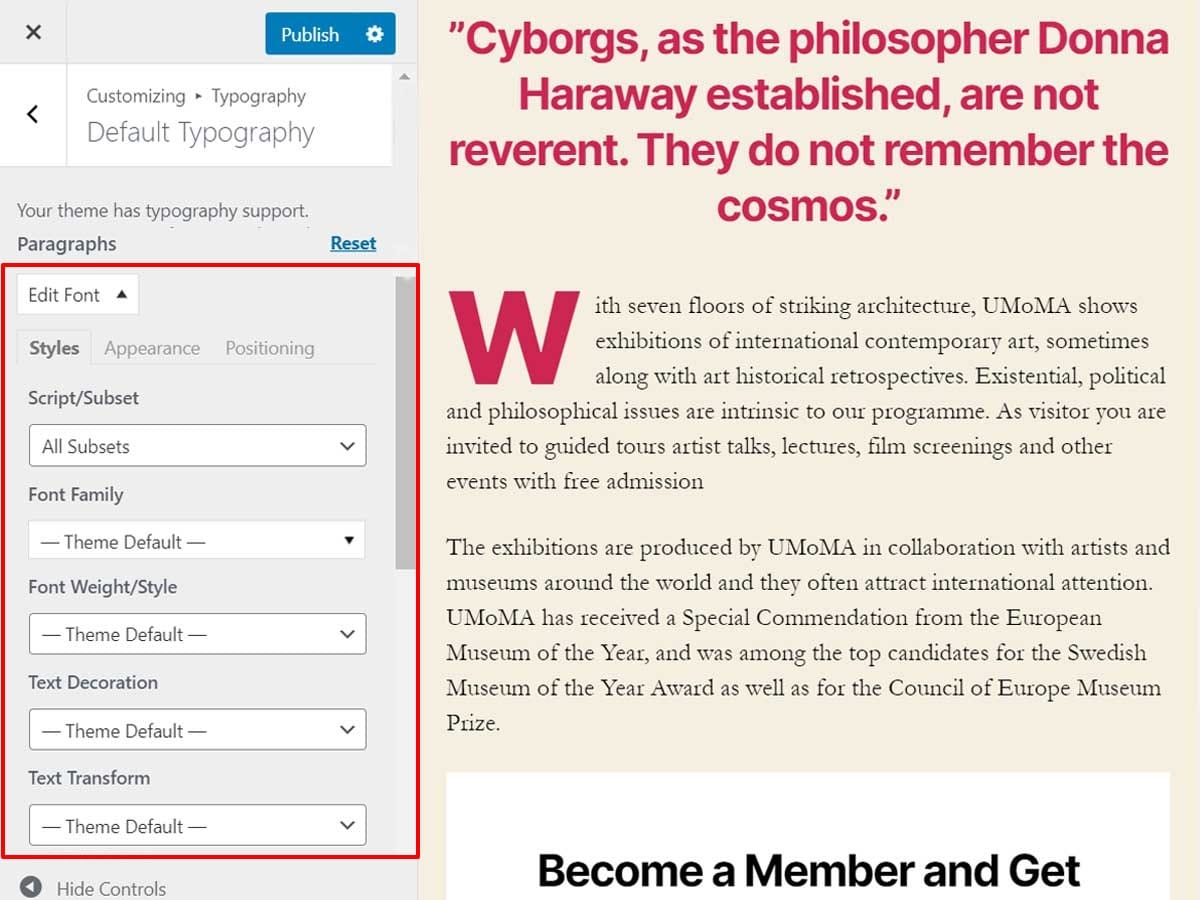
- Navigate to Appearance>>Customize>>Typography>>Default Typography.
- You’ll see a different section of your website. Click on Edit font option under the targeted section you want to edit.

- From Font family, you can pick any Google Font you wish to use on your site. You can also choose font style, text-decoration and transformation.
- From Appearance tab, you can control font size, line height and line spacing as well.
- Similarly, you can also edit padding, margin, border and more from the Positioning tab.
- Finally, click on publish button at the top to save the changes you made.
Method 2: Manually Add Google Fonts
In this method, you need to edit theme’s header.php file. So it is not recommended for beginners.
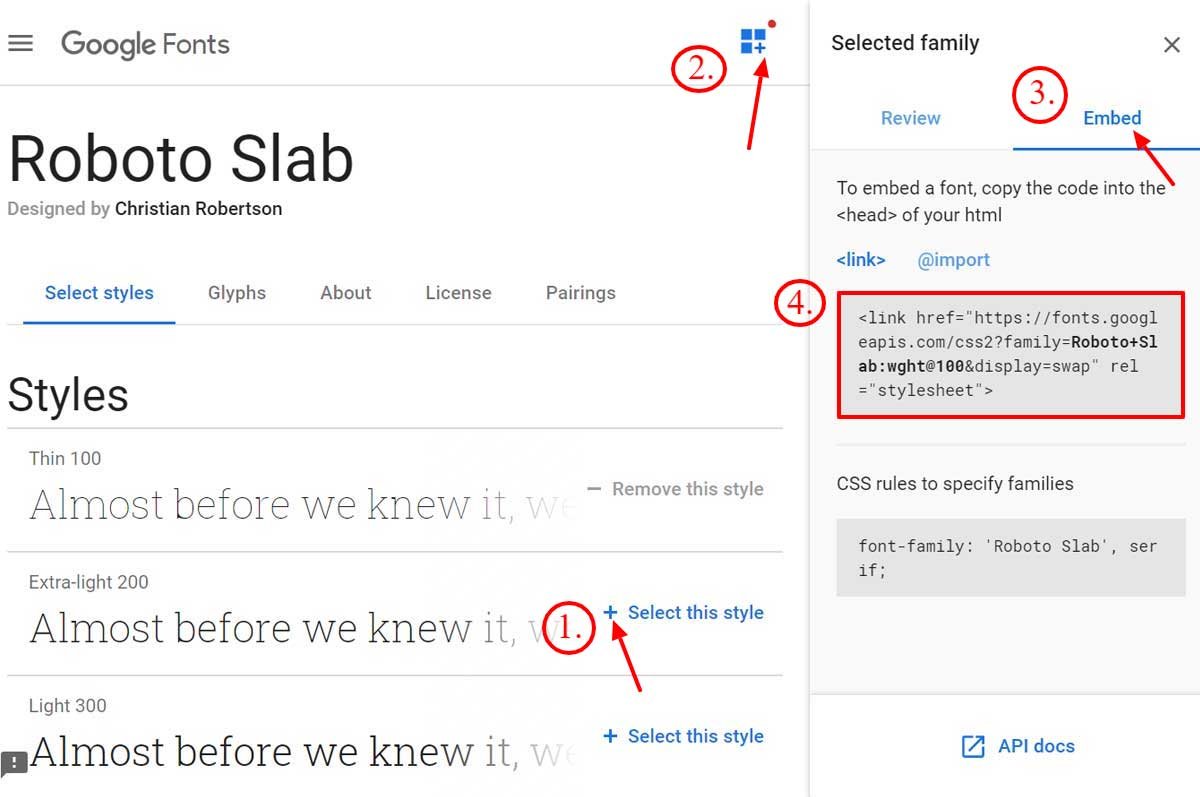
- Navigate to Google fonts library and add choose the suitable fonts for your website.
- Next, select whichever style that you want to use and click on the sidebar icon located at the top right-hand side.

- Then hit the embed button and copy the embed code.

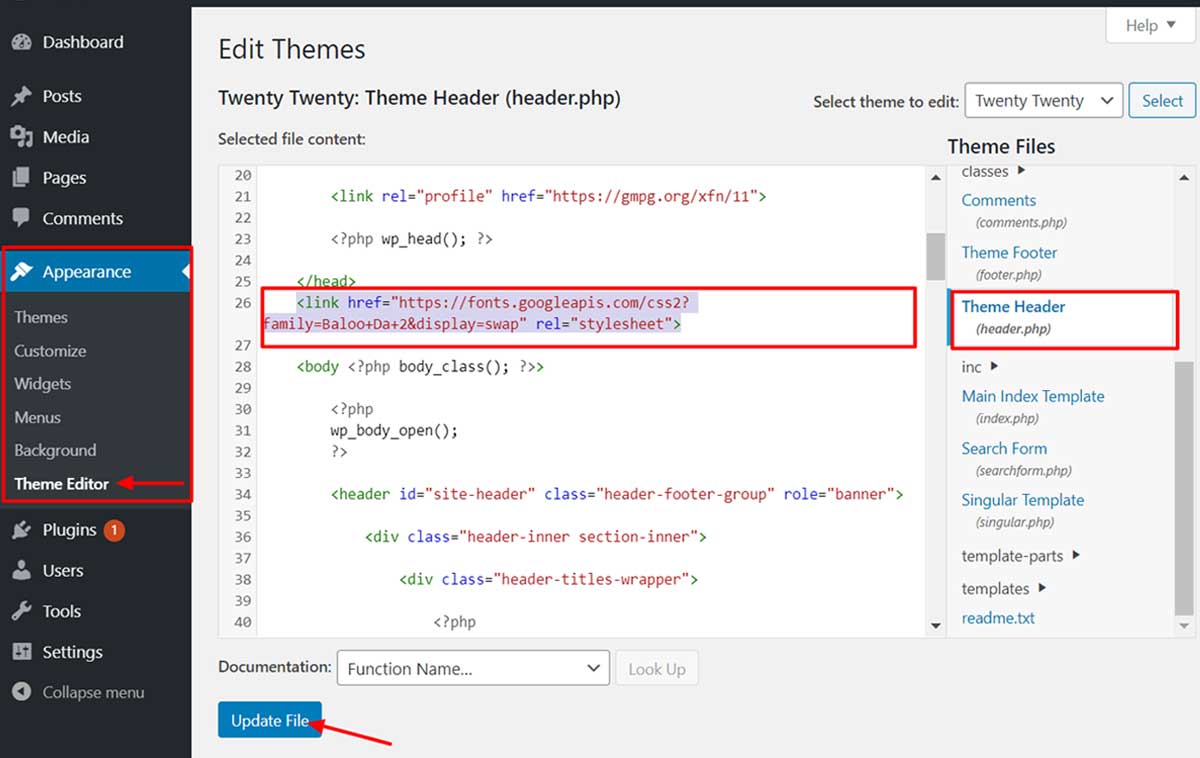
- Now go to Appearance>>theme editor. Click on header.php file and paste the code right before <body>tag.
- Finally, click on Update button to implement it.
Congratulation! You have successfully added custom fonts in WordPress website.
Final Thoughts
That’s how you can add custom fonts in WordPress. Hopefully, this article is helpful. Make sure that the fonts you choose suits your brand perfectly. You can also follow us on Facebook and Twitter.
If you have any queries, feel free to ask on the comment section below:
Other Related Articles:

One thought on “How to Add Custom Fonts in WordPress(2 Methods)”