How to Create New Posts in WordPress-Beginner’s Guide
How to Create New Posts in WordPress
Have you published your first post in WordPress yet?
The basics of creating and publishing posts in WordPress might seem quite an easy task for you. However, beginners often don’t utilize all the power of the main features available in WordPress. It’s a good idea to get an overview with all the elements used to create a complete post.
In this guide, we’ll learn how to create new posts in WordPress detailing all main features to make most of WordPress has to offer.
How to Create New Posts using Gutenberg Editor
With Gutenberg editor, it’s extremely easy to add custom posts in WordPress. First of all, login to the WordPress admin panel with your username and password. Then navigate to the Post>>Add new. You will see the post editor screen similar to as shown in the figure.
Add Title and Content Block
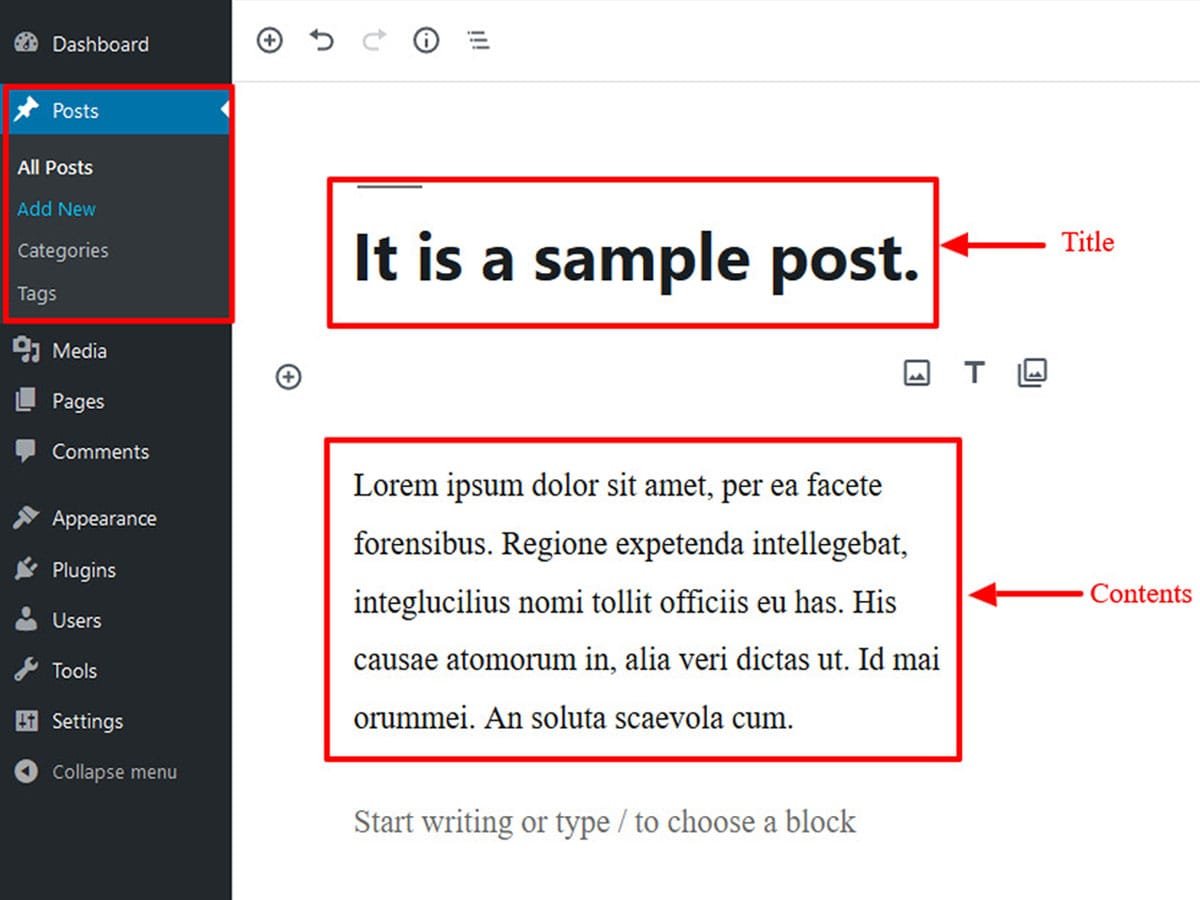
WordPress block interference is pretty simple and easy to use. You can enter the post title at the top part. Beneath that, you can add contents using blocks.
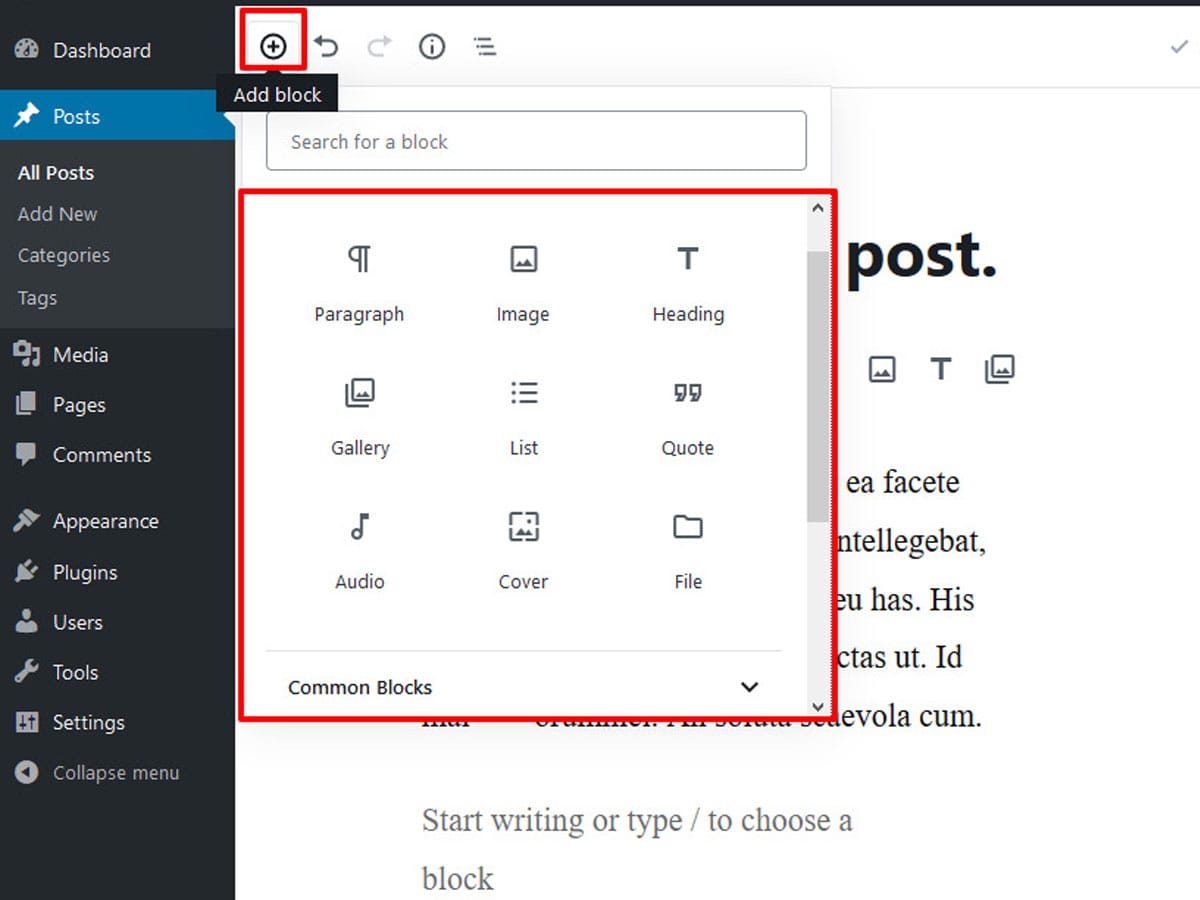
In order to insert a block, all you have to do is click on the plus icon on the top left corner. There are multiple blocks for different types of content that you can click to select. It’s as simple as that.
For example, you can easily add an image by using the image block and then upload the image you want to add in your content.
Add Category and Tags
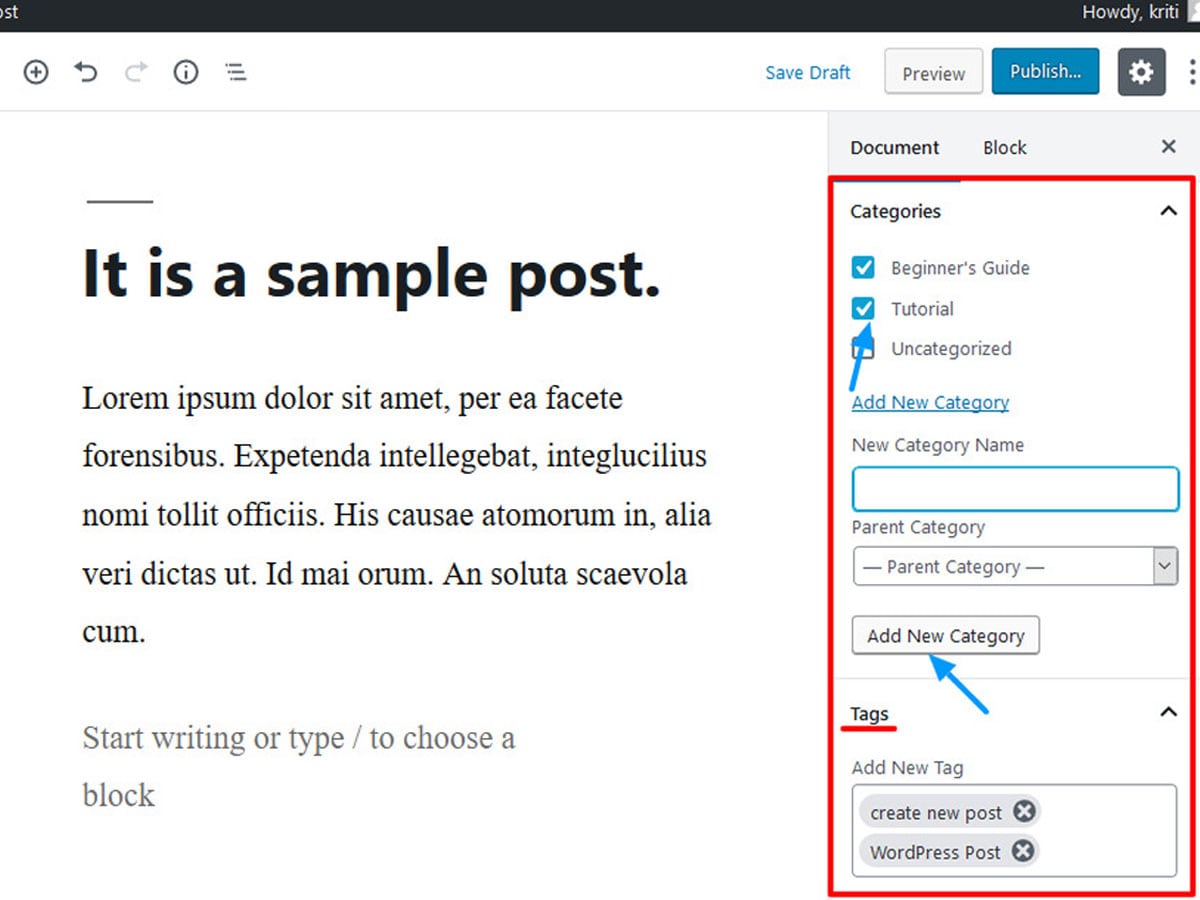
WordPress allows you to add the categories and tags in a post to organize the contents. It is useful to group similar content in a hierarchical manner. It’s important to add categories and tags to create a post in WordPress.
To add categories in a post, go to category meta box present at the right-hand side. Choose the suitable category by ticking the checker box. You can add the new category by clicking on the add new category button.
Beneath that, you can add tags to your post from tags meta box. All you have to do is type tags in the box as shown in the image.
Add Features image, Excerpts and Discussion
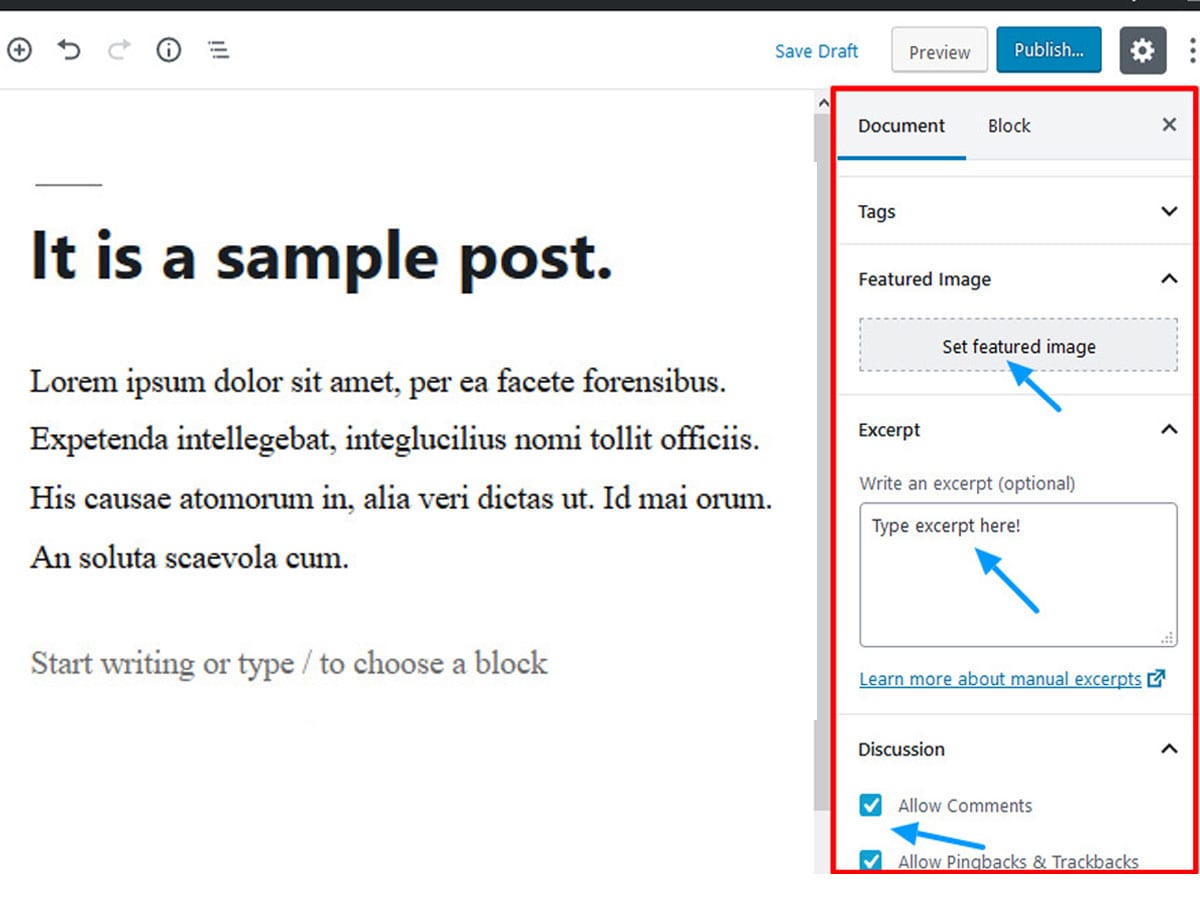
WordPress allows you to add the featured image to your post. Simply click on the featured image meta box and upload an image. You can also add an excerpt to your post in WordPress. Excerpt is a short summary of your post. Just click on the excerpt meta box and type the summary.
You can also allow or disallow comments, pingbacks and trackbacks in WordPress for a specific post. To do so, just tick the checker box next to allow comments and allow pingbacks and trackbacks.
Saving and Publishing a Post in WordPress
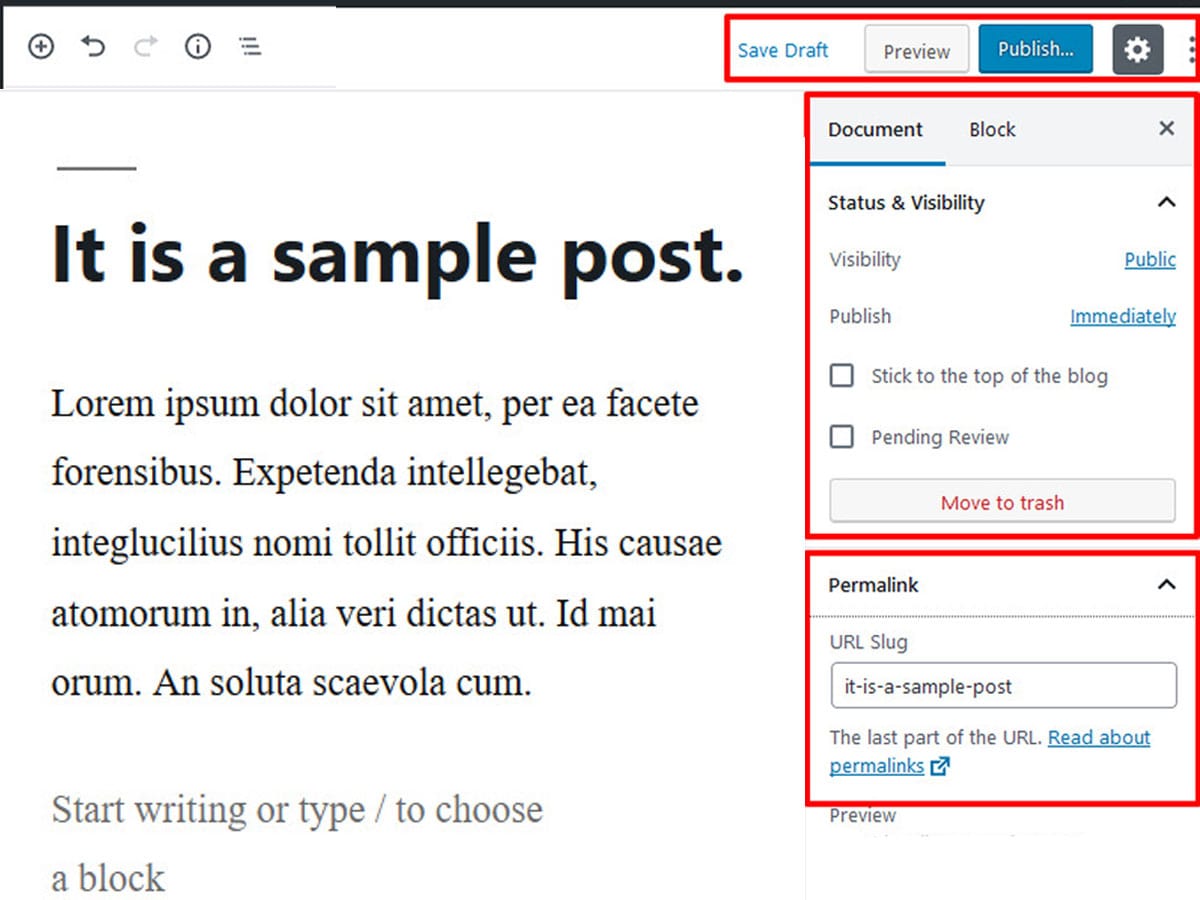
In order to save the post as a draft, click on the save as draft button at the top right corner. WordPress also automatically saves your content as you write. Next to that is the preview button which is quite handy to see how your post will look after publishing. Finally, click on the Publish blue button to publish the blog on your website.
Now, click on the gear icon located beside the publish button. It brings additional features. Click on the blue link next to visibility to make your post public, private as well as password protected. Furthermore, the blue link besides publish allows you to schedule your post for publishing in future.
Similarly, you can tick the box to make your post stick to the top of the blog as well as pending a review. You can click on the move to trash button to delete the post. You can restore it under 30 days.
Customize the Permalink
Another useful feature that WordPress offers is Permalink customization. Permalink is the permanent URL or address of the post where your contents are stored permanently. It is also referred to as a slug.
WordPress automatically generates the post permalink. However, you can also edit it from the permalink panel present at the right-hand side.
Add Screen option
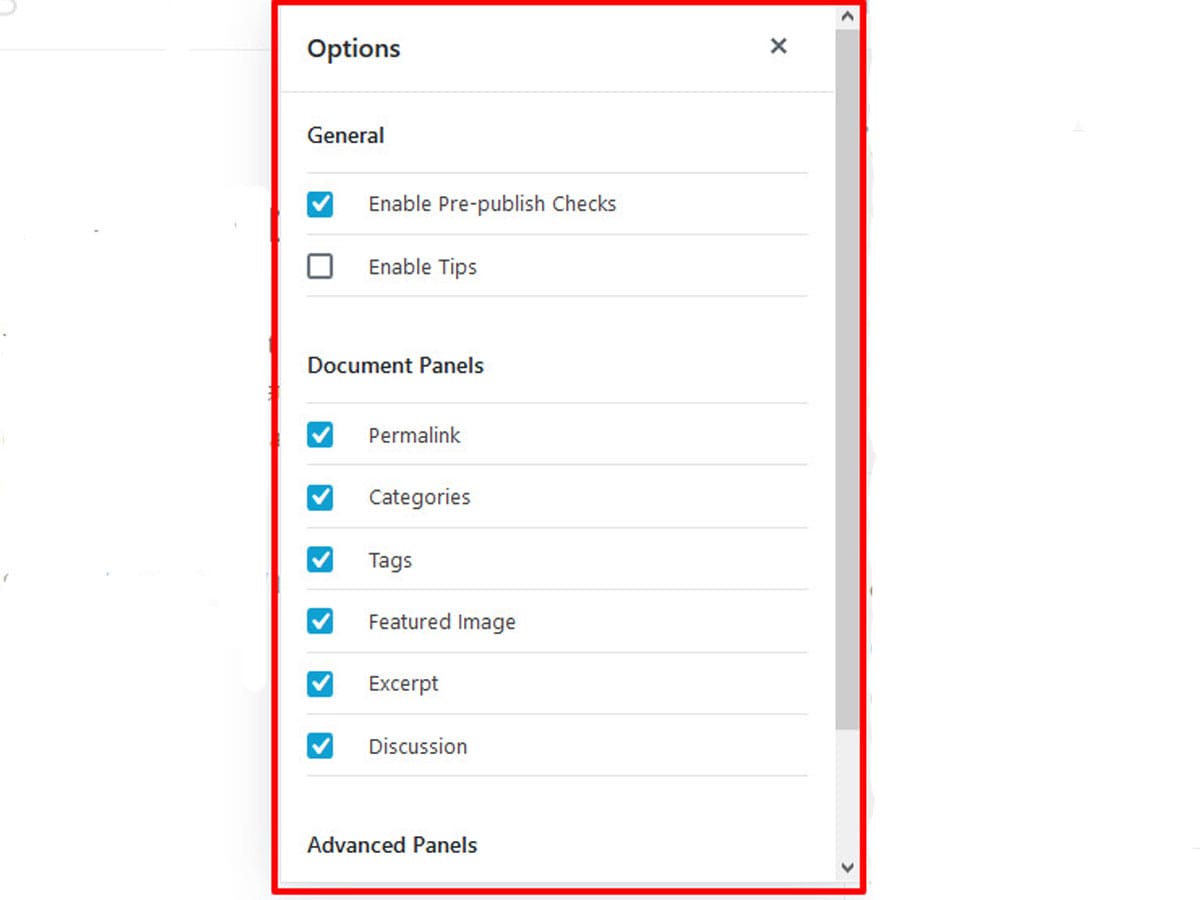
If you have newly installed WordPress then some of the key elements or features may be hidden. If so, go to the three-dot located besides gear icon then click on the option at the bottom. Now, tick the checkbox to add the desired key element as shown in image.
Shortcuts to Create New Posts in WordPress
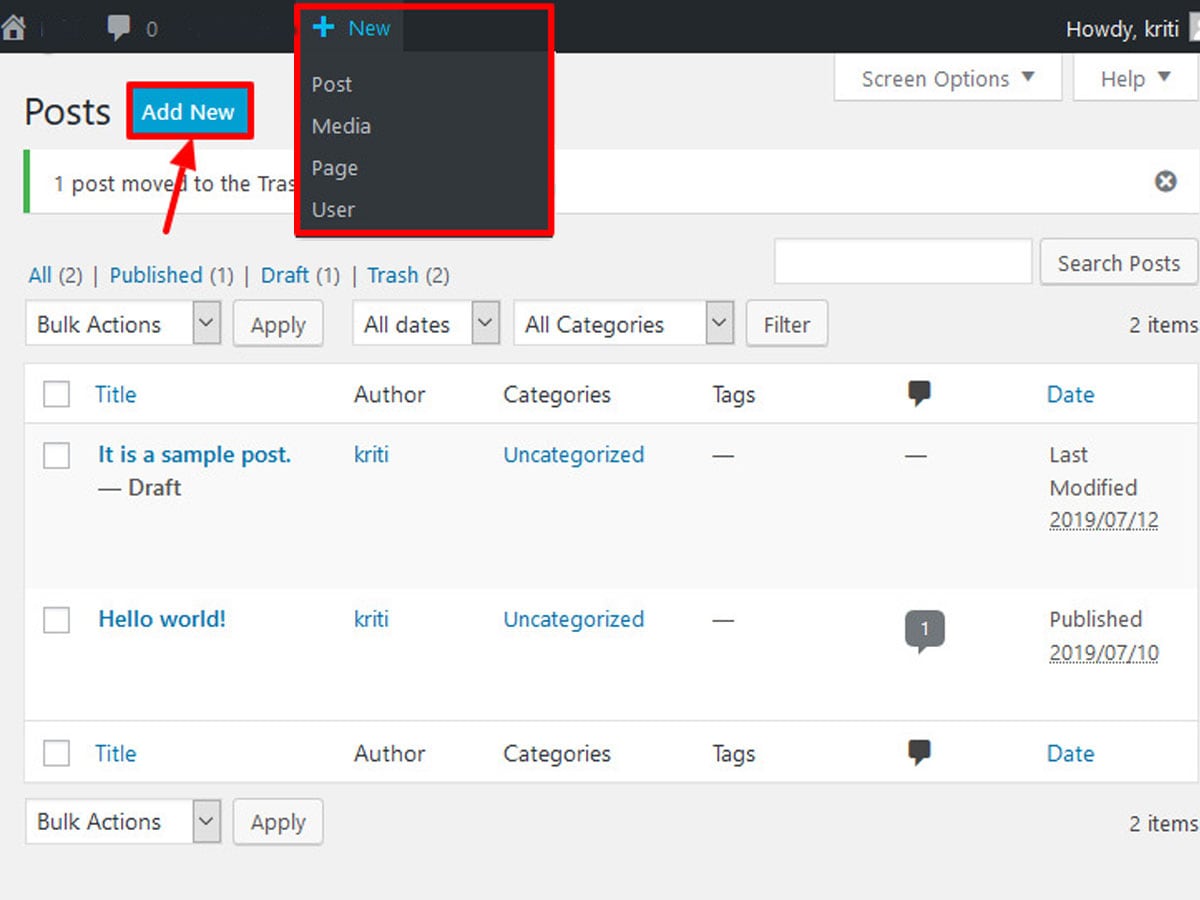
WordPress also has a shortcut available to navigate to the post edit screen. It is very useful and saves considerable amount of time. Hover over the New link located at the topmost bar then click on the Post. You’ll get directed to the new post edit screen.
That’s it! You have successfully created posts in WordPress as well as learned to utilize its features.
Wrapping Up
To wrap up, you can create new posts in WordPress by following above mentioned steps. If you find this article helpful, join our newsletter for more informative articles and follow us on Facebook and Twitter.
You are welcome to write to us in the comment section below.

I am continually searching online for tips that can aid me. Thanks!