How to set up Staging on your WordPress Site

If you have a WordPress site, you know that frequent updates, adding new plugins/themes, and design changes are part of the website maintenance process. However, making all these changes on your live site can be risky. Sometimes, even a small change can cause your website to malfunction, or even crash. With that, comes website downtime, lost traffic, and of course, time wasted debugging and fixing the issue.
Website staging is the process of creating a replica of your live website. Testing changes in a staging environment is safe as it does not impact the live website. With staging, you can also merge only the required changes with the live site after you’ve tested them thoroughly.
Why is Website Staging Necessary?
For any existing WordPress website, staging allows to test the following elements safely:
- WordPress Updates: This includes making updates or upgrading to the latest version of WordPress or any of your installed plugins/themes. Applying these updates to the live website can be risky and could result in a broken website or any other compatibility issues.
- Code changes: As a WordPress developer, you can safely modify your website code on a staging site without worrying about its impact on your live website.
- Website design: For WordPress sites, website design is much easier thanks to the availability of a variety of free WordPress themes that can help you experiment with the look and feel of the site. You can safely test these design elements on a staging site before merging them with your live site.
- WordPress backups: As a best practice, it’s always recommended to first test your website backups before restoring them to a live website. A staging site is a safe platform to test any of your stored backups.
How to Implement Staging on your Website:
You can create a WordPress staging site using any of the following three methods:
Website staging using a plugin
Luckily for WordPress sites, you can make use of popular staging plugins like WP Staging to create a staging site. These plugins are easy to install and execute – just like any other WordPress plugins.
However, selecting the right staging plugin is of paramount importance. Some plugins can consume excessive server resources and impact their performance. Other plugins may not be compatible with multisite networks.
A good option for WordPress staging is the WordPress backup plugin that combines website backups with staging. You can easily set up a staging site on its dedicated server and avoid any overloading of your local web servers. It also works with WordPress multisite networks.
Here’s how you can create a staging site using the plugin:
- Download and install a plugin(BlogVault) on your WordPress site.
- After registration, log into your BlogVault dashboard.
- From the dashboard, select Add Staging Site.

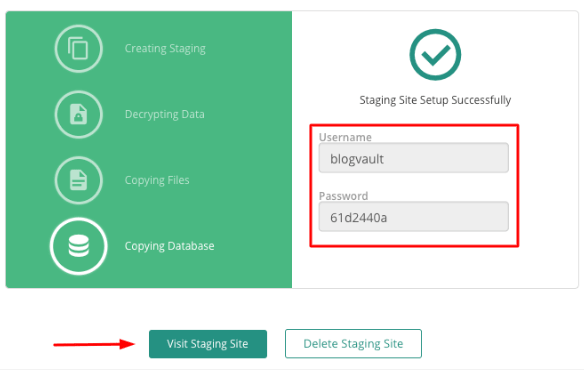
- Next, open the staging site by clicking on the Visit Staging Site.
(Note: Your staging website is password protected from search engine indexing)
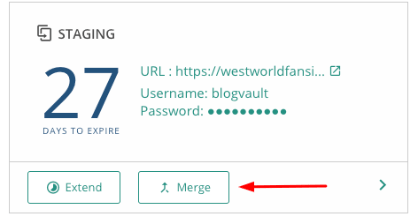
- After making the modifications to the staging website, you can use the merge feature to copy the changes to your live website.

That’s it. You’re done.
Website staging through the web host
Most of the popular WordPress hosting platforms like Bluehost and Kinsta offer website staging as part of their packages. This option is convenient as you do not have to spend your time and effort setting up the staging site.
On most platforms, you can access this feature right on the dashboard, and use the “Push to Live Site” or “Deploy to Live site” option to merge changes with your live site.
On the flip side, many WordPress hosting companies may not offer staging services at all or may offer them only with their premium and more expensive hosting plans. Others may charge a steep additional fee for website staging. Besides the cost aspect, website staging using your web host can consume your current server resources, thus impacting its speed and bandwidth.
Depending on your current web host, the staging process can differ. Typically, you need to sign in to your hosting account and navigate to the staging functionality. After creating the staging site, you need to log into your staging account to make the necessary modifications to the staging site. Post that, you can choose to merge the modifications from the staging to the live website.
Website staging using manual methods
If you’re familiar with the technical nitty-gritty of WordPress, you can even set up a staging site manually. In addition to some advanced WordPress know-how, you’ll also need to be comfortable with FTP tools and handling the WordPress database. Manual staging can be very time-consuming, and even a small error can be hard to debug
Typically, manual staging comprises of the following main steps:
- Create a subdomain folder (example, “Staging”) that can store all the staging-related files and folders of your main website folder. You can do this from your cPanel.

- Next, create an FTP account for your subdomain folder. This account enables you to upload your existing website files and folders to the staging site.
To create an FTP account, go back to the cPanel and select FTP Accounts from under Files. Enter account details and ensure that the Directory matches with the sub-domain you just created.
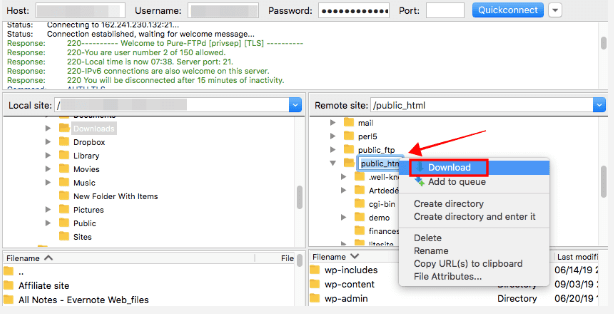
- Using an FTP tool like FileZilla or through the “File Manager” facility in your WordPress hosting account, download all the website files (and folders) from your live site to your computer.

If you are using an FTP tool, remember to use the FTP account credentials of your live WordPress site and not that of your subdomain.
- Next, use the FTP tool to upload all your downloaded website files and folders to the staging site.
During this step, you need to use the FTP account credentials that you created in Step 2.
For both steps 3 and 4, you can download and upload WordPress database files using the phpMyAdmin tool in your web hosting account.
- Next, modify the wp-config.php file on the staging site by replacing the existing database details (pointing to your live website database) with the database credentials of your staging site. This step is necessary to connect your staging site with the database tables.
- Then, install and use the “Hide My Site” plugin to hide your staging site from any search engine. This plugin prevents Google from adding an index to your staging site.
- Finally, make the changes and updates on the newly created staging site before merging these changes with the live website.
Wrapping Up
Website staging for WordPress sites offers multiple benefits. It is a great way to ensure that you have the flexibility and freedom to experiment with your site without any impact on the live site.
Our recommendation is to opt for a plugin that simplifies the entire staging process so you focus on building a better website. However, managing multiple plugins can be hard. We suggest that you pick one that combines staging with other useful features.
We’d love to know your experience with staging.
If you find this article helpful then don’t forget to comment and follow us on Facebook and Twitter.

One thought on “How to set up Staging on your WordPress Site”