Gutenberg WordPress Editor: Everything you need to know!
If you have been using WordPress, you might have heard about the Gutenberg WordPress Editor. Don’t worry if you haven’t. In this article, we will introduce you to Gutenberg and how to use it. So, let’s start with a basic introduction to this WordPress block editor.
Gutenberg Block Editor is the block editor that was introduced in WordPress 5.0 back in 2018. To put it simply, Gutenberg allows you to drag and drop different blocks or elements, like headings, paragraphs, and tables into your content for more efficient creation.
Since its introduction, Gutenberg has gone through various updates and fixes for almost two years. With the goal of providing a Full Site Editing (FSE) experience for users to make content creation much easier and SEO-optimized.
The editor is designed around the concept of blocks, so you’ll have access to different types of design capabilities that will make your content look great. This editor also makes it easier for you to organize your content efficiently, which will help your audience navigate through your content effortlessly.
Now, let’s discuss Gutenberg thoroughly, including its features and tutorials on how to use it:

Overview of Gutenberg Editor
The Gutenberg Block Editor, named after German inventor Johannes Gutenberg, was introduced in WordPress 5.0 in December 2018 as the revolutionary block editor of WordPress. Replacing its predecessor, TinyMCE, or Classic Editor, Gutenberg was created to make content creation a lot easier and more efficient. With this WordPress block editor, you can now create posts and pages rich in media without having to know a single line of code.
In July 2021, WordPress 5.9 was introduced. This brought phenomenal changes to the Gutenberg editor. Many issues that came with the initial version of this editor were solved. The new version of Gutenberg also introduced Full Site Editing (FSE). It made content creation a lot easier without having to add external plugins such as Elementor, DIVI, Beaver, etc.
For already-experienced WordPress editor users, TinyMCE Editor or Classic WordPress Editor were hard to use. But with this new, revolutionized Gutenberg editor, even non-experienced absolute beginners can create the contents beautifully and professionally.
Major Features of Gutenberg
Now we know that Gutenberg was created to facilitate content creation. Let’s dive into its features more deeply to gain a better understanding of them.
- Full Site Editing (FSE): The Gutenberg block editor gives the user or content creator the ability to edit their post, page, or site in full view with blocks as an editing menu.
- Easy to Use: It’s drag-and-drop feature allowed users to just place elements like headings, paragraphs, lists, tables, etc. in the editing area and configure their content easily and efficiently.
- Compatibility and seamless integration: After the introduction of WordPress 5.9, Gutenberg is compatible with almost all the themes and plugins available in WordPress.
- Responsiveness: You can edit your site without worrying about it’s responsiveness on different devices. You can see how your website will be seen on three of the most commonly used devices: mobile, desktop, and tablet.
- Block Customization: With Gutenberg, you can customize the blocks for better content management or organization.
- Embeds: It allows users to embed foreign resources from outside platforms, such as social media sites, video sharing platforms, and others, directly into their WordPress site.
Using WordPress Gutenberg Editor
Since the world of Gutenberg might be a little bit overwhelming at first sight, you might need a slight push from the Gutenberg editor. Once you let yourself into this world, it will be harder to ignore this WordPress block editor.
The Gutenberg Interface: First Look
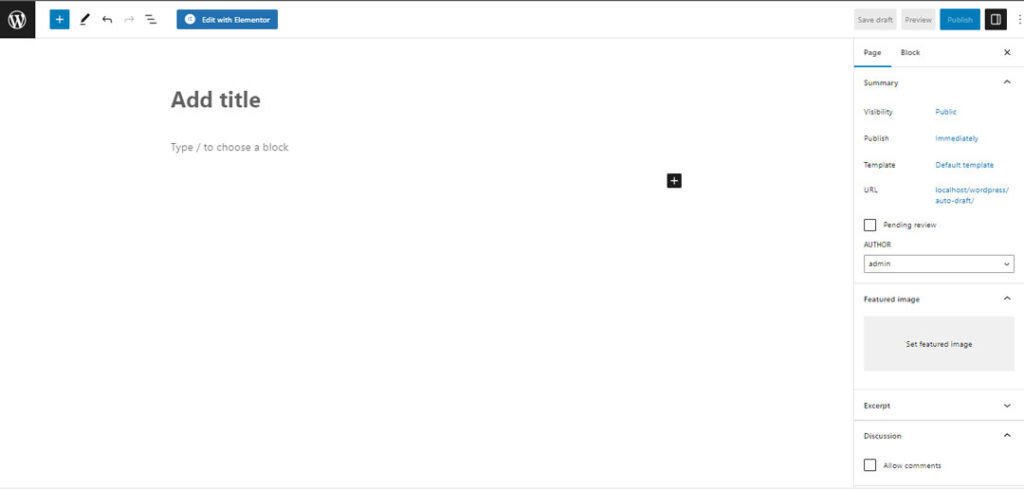
This is the first screen you’ll be seeing after you open the Gutenberg editor. It might seem empty at first, but there’s a whole lot of blocks and tools just waiting for you to use them.
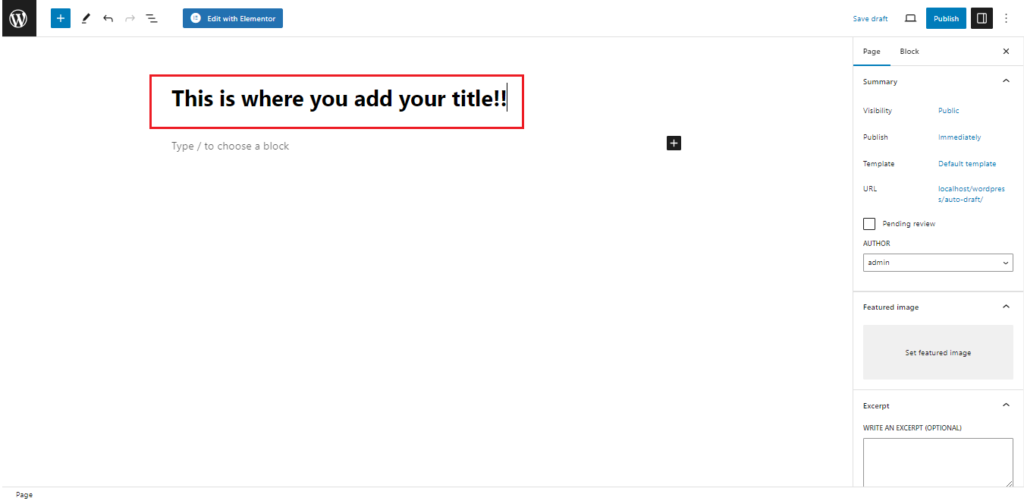
Adding a title!
Adding a title is very easy; you just have to click “Add Title“. The title you choose will be the showcase line you would like your user to see. Just pick a title for your page or post and type it down.
Choose your block.
Choosing a block is very easy in Gutenberg Editor
There are three methods for choosing a block:
- You just have to click
 the icon in the top left side of the Gutenberg Editor, and a whole drag-and-drop menu will appear with every block available at your resource.
 - Click the “+” icon in the editor screen, which will give you basic blocks for content creation as shown in the image below.
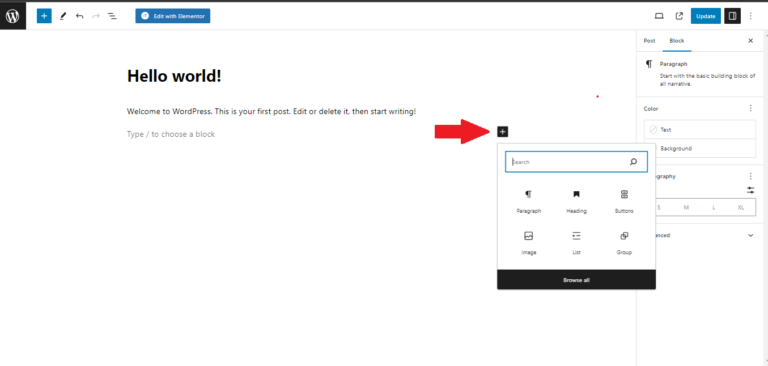
The remaining two methods will give you a shorter menu with fewer block options, but you can access all blocks by clicking “Browse All“
3. You can just add a forward slash “/” in the blank white screen of the editor, where you will get a list of the most used or recently used blocks.
Inserting your block
For writing a paragraph, you can simply click the screen and start typing. But if you want other blocks, let’s say that you are going to write a heading for your content. As shown below, you have to click the heading icon and simply drag it on the screen, or you can just click it.
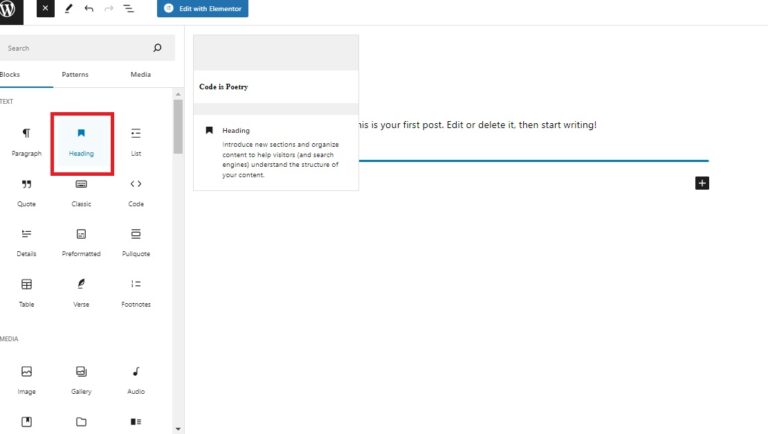
After selecting the block, you can choose your heading, which ranges from H1 to H6. H1 is the biggest and is defaulted to the title,” which comes at the initial interface of the WordPress Block Editor.
Adding linking text
Now that you have learned how to insert a block, let’s learn how to insert a link in the particular text step by step:
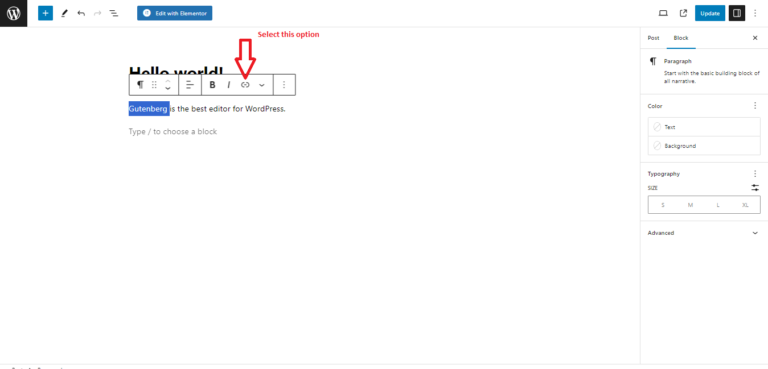
Step 1: Select the text you want to add a link to, and a quick option bar like this ![]() will pop out.
will pop out.
Step 2: Press on the link button, as shown below
Step 3: Add your link in the link area that appears
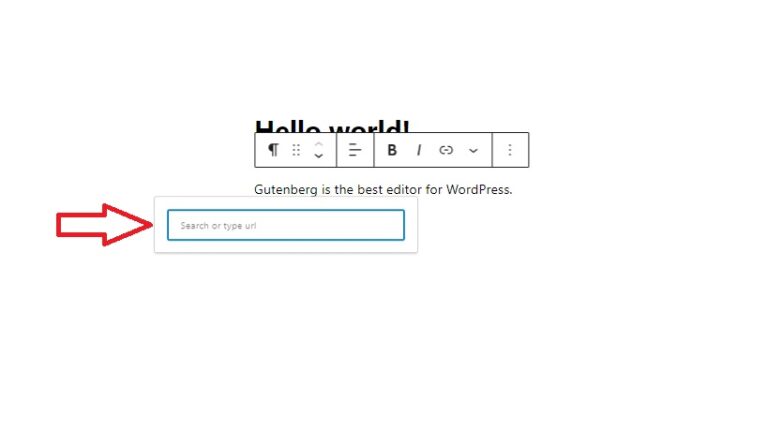
You can also change blocks, arrange the hierarchy of the content, align your content, make your text bold or italic, or choose options from a drop-down menu for effective content formatting.
Advanced Configurations
Suppose you want to make your content more visually appealing by doing more advanced editing. Well, worry not, because Gutenberg has you covered in this area as well.
Just look for this ![]() button at the top right-hand side of your editor, besides ‘Publish’ or ‘Update’
button at the top right-hand side of your editor, besides ‘Publish’ or ‘Update’
Publish will appear when you have yet to publish your content, and Update will appear when you are editing the published content.
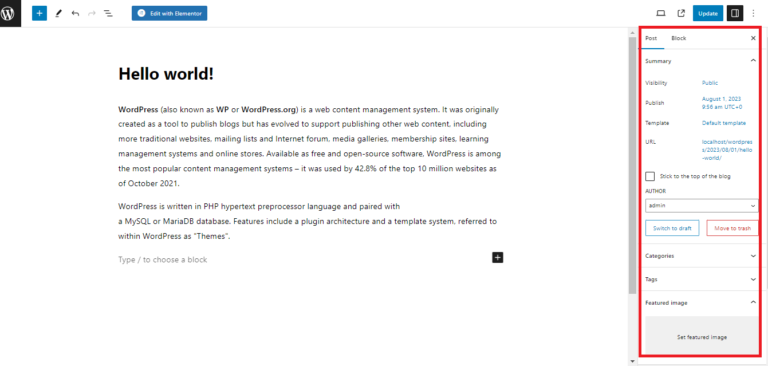
You can deeply configure your content through this panel.
Highlighted on the right-hand side of the image*
The “Post” panel allows you to configure your options for the whole post.
Here’s what you can do on this panel:
- Change the privacy of your content: You can change your post to be viewed privately or publicly, or you can also protect your content via a password.
- Categories and Tags: You can specify your content with categories and add tags to your content to make the user aware of what your content is really about.
- Featured Image: You can add your content’s featured image to this panel.
- Excerpt: This panel allows you to summarize your content with an excerpt.
- Comments and Pingbacks: Comments and pingbacks can be allowed or disallowed in this section.
Block Editing Panel
Perhaps one of the most important sections in this editor for configuring your contents is the Block Editing Panel, which allows you to configure your blocks and content in it to make it visually and functionally attractive.
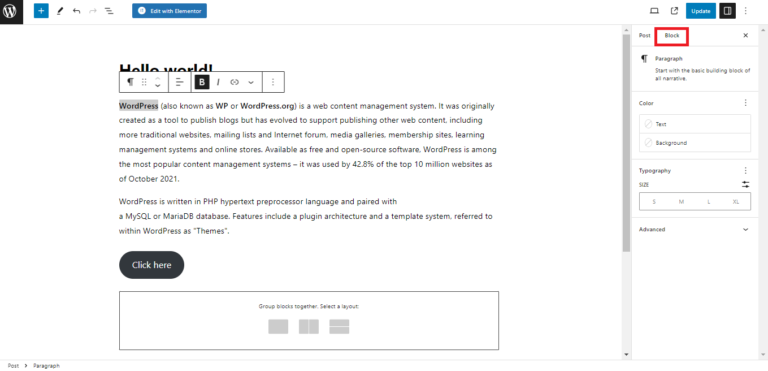
You can see the block editing panel on the right side (highlighted in red).
Different blocks have different configuration settings, like your ability to adjust width and layout orientations for buttons, groups, and columns.
Color and typography options are available for every block element.
Let’s talk about some of the major options in this panel to help you get started:
- Color: You can customize your text or background color by clicking on the Text or Background option in the Color bar.
- Typography: You can change the size of your text from Small (S), Medium (M), Large (L) and Extra Large (XL)
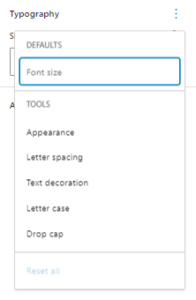
If you click the Kebab Menu (three-dot icon) beside Typography, you will get options to change the appearance, letter spacing, drop-cap, and letter cases in one single menu.
There will be vast options for you to use in each of the blocks.
- Advanced Settings: This is mostly applicable for developers or someone with HTML and CSS knowledge. Advanced settings have their own benefits. Some of them are:
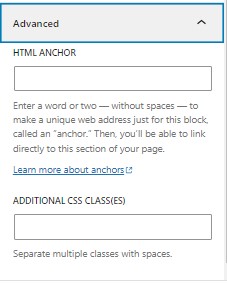
- Anchor text: You can create anchor text, which is crucial in creating a table of contents (if you don’t have external tools for it).
- Additional CSS Class(es): You can now beautify your contents more with your own CSS classes.
As we discussed, different blocks will have different configuration options, such as:
- Button blocks have width settings and radius adjustment sliders.
- Group Blocks have Orientation and Layout Adjustment settings
- Tables have fixed-width table cells, header notes, and footer notes.
Wrapping Up!
Now that you have read about all the amazing features, benefits, and basic how-to of the Gutenberg WordPress Editor, it’s time to get started with it!. Use the tips and tricks provided to enhance your content creation experience. Remember, the Gutenberg Editor is all about improving your workflow and making it easier to create stunning content. Play around with it, see what works for you, and enjoy the process. Happy Creating!

12 thoughts on “Gutenberg WordPress Editor: Everything you need to know!”